The Singer handheld sewing machine is a portable, easy-to-use device designed for quick repairs and small sewing projects․ It offers a single-thread chain stitch mechanism, perfect for lightweight fabrics and DIY crafts․ The machine comes with a quick start guide, making it accessible for beginners․ Ideal for crafters and DIY enthusiasts, it provides convenience and versatility for on-the-go sewing needs․ The manual emphasizes using genuine Singer accessories for optimal performance and longevity․
1․1 Overview of the Machine and Its Features
The Singer handheld sewing machine is a compact, portable device designed for quick repairs and light sewing tasks․ It features a single-thread chain stitch mechanism, ideal for simple mending and small fabric projects․ The machine operates in handheld or desktop modes, offering versatility for various sewing needs․ Key features include a reverse stitch function, easy-to-use controls, and compatibility with standard Singer needles․ It also includes a quick start guide for seamless operation, ensuring users can begin sewing immediately․ The machine is lightweight, battery-operated, and perfect for on-the-go use․
1․2 Benefits of Using a Portable Sewing Machine
The Singer handheld sewing machine offers exceptional portability, making it ideal for on-the-go repairs and small projects․ Its lightweight design allows easy transport, while the battery operation ensures convenience without cords․ Perfect for quick fixes, it enables users to sew anywhere, anytime․ The machine’s compact size and ease of use make it a practical tool for DIY enthusiasts and crafters, promoting creativity and efficiency in various settings․ It’s a versatile solution for both beginners and experienced sewists․

Getting Started with the Handheld Singer Sewing Machine
Unbox and set up your machine, ensuring all parts are included․ Insert batteries, choose between handheld or desktop mode, and begin sewing with safety precautions in mind․
2․1 Unboxing and Initial Setup
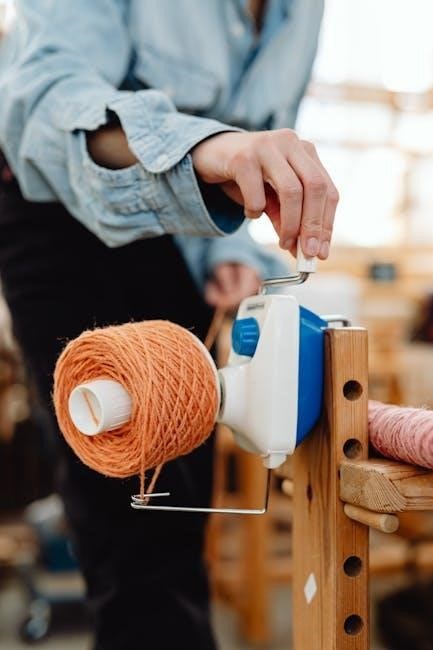
Upon unboxing, ensure all components are included: the machine, adapter, needles, bobbins, and quick start guide․ Insert 4AA batteries into the compartment or use the AC/DC adapter․ Place the machine on a flat surface or hold it comfortably․ Switch the mode selector to handheld or desktop based on your preference․ Before sewing, ensure the machine is in the off position․ Familiarize yourself with the controls and parts using the provided guide․ This setup ensures you’re ready to begin your sewing journey smoothly․
2․2 Understanding the Machine’s Controls and Parts
Familiarize yourself with the machine’s key components: the mode selector switch, ON/OFF button, reverse stitch button, and bobbin compartment․ The mode selector allows switching between handheld and desktop modes․ The ON/OFF button controls power, while the reverse stitch button enables backstitching․ Locate the needle bar, take-up lever, and stitch length regulator․ Ensure the needle is installed with the flat side facing forward․ The bobbin compartment holds the class 15 metal bobbin․ Understanding these parts ensures proper operation and troubleshooting․ Always refer to the manual for detailed diagrams․

2․3 Quick Start Guide for Beginners
Start by inserting 4AA batteries into the compartment or using a 6V adapter․ Turn the ON/OFF button to activate the machine․ For handheld mode, press the button to begin sewing․ Test on scrap fabric to ensure proper stitch formation․ Use the reverse stitch button for backstitching․ Always thread the machine correctly and install the needle with the flat side facing forward․ Practice on lightweight fabric before working on actual projects․ Consult the manual for detailed setup and operation guidance․
Threading and Setting Up the Machine
Thread the machine by following the diagram, ensuring the bobbin is correctly installed․ Insert the needle with the flat side facing forward․ Always use a standard sewing needle for optimal performance․

3․1 Step-by-Step Threading Instructions
To thread the Singer handheld sewing machine, insert the thread through the machine’s tension guide․ Gently pull the thread to remove any slack․ Next, guide the thread through the needle, ensuring it is seated properly․ Insert the bobbin into the bobbin case, making sure it is correctly aligned․ Turn the machine off before starting to thread․ Always use a standard sewing machine needle and a class 15 metal bobbin for optimal performance․ Follow the diagram provided for precise threading․

3․2 Installing the Needle and Bobbin
Attach the needle by inserting it into the needle bar, ensuring the flat side of the shank faces forward․ Secure it firmly․ For the bobbin, lift the slide plate and place the bobbin into the bobbin case, aligning the notch with the case․ Close the slide plate gently․ Always use a standard sewing machine needle and a class 15 metal bobbin for compatibility․ Handle the needle carefully to avoid bending or breaking․ Refer to the manual for diagrams or specific instructions if needed․
3․3 Adjusting Tension for Optimal Sewing
Proper tension ensures smooth stitching and prevents thread breakage․ To adjust, locate the tension dial on the machine․ Turn it clockwise for tighter stitches or counterclockwise for looser stitches․ Test on scrap fabric and adjust until the thread lies flat․ For bobbin tension, gently pull the thread; it should resist slightly․ If uneven stitches persist, consult the manual for detailed calibration steps․ Proper tension ensures consistent results and extends the machine’s lifespan․

Operating the Handheld Singer Sewing Machine
The Singer handheld machine offers dual functionality, operating in both handheld and desktop modes․ It supports forward and reverse stitching, ideal for small repairs and lightweight fabrics, ensuring versatility and convenience for various sewing tasks․
4․1 Sewing in Handheld Mode
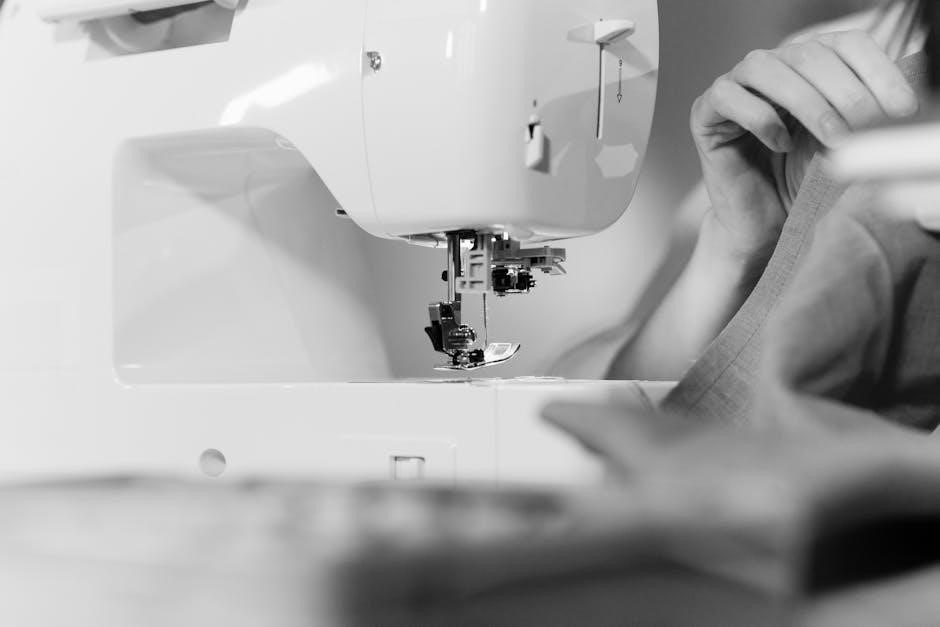
Handheld mode allows for precise control and portability, making it ideal for small repairs or delicate fabrics․ To activate, switch the mode selector to handheld and press the ON/OFF button․ The machine operates on batteries or an adapter, offering convenience for on-the-go use․ Guide the fabric smoothly under the needle, using the reverse stitch button for reinforcing seams․ This mode is perfect for quick fixes, hemming, or crafting small projects with ease and mobility․
4․2 Switching to Desktop Mode for Larger Projects
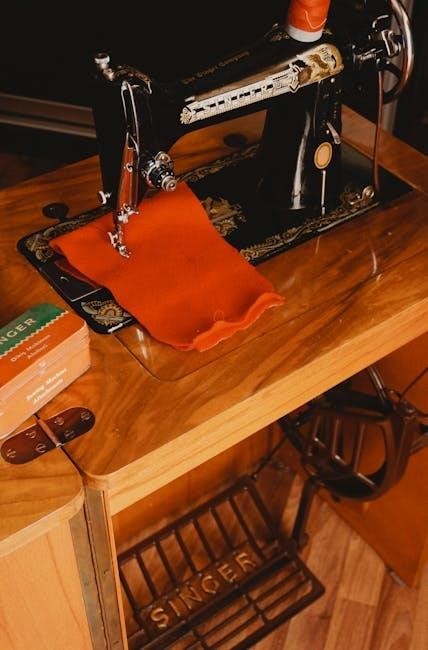
To switch to desktop mode, move the mode selector switch to the desktop position․ This setup provides stability for larger projects, such as quilting or home decor․ Attach the extension table for increased work surface area․ The machine then functions like a traditional sewing machine, offering more control for extensive stitching․ Ideal for heavy-duty fabrics and complex designs, desktop mode enhances precision and efficiency for bigger tasks, making it versatile for both portable and stationary use․ Ensure the machine is placed on a flat surface for optimal performance․
4․3 Using Reverse Stitch Function
To activate the reverse stitch function, press and hold the reverse stitch button while sewing․ This feature is useful for securing seams at the beginning or end of a stitch line․ Release the button to return to forward stitching․ Ensure the machine is in desktop mode for better control when using this function․ Reverse stitching is ideal for reinforcing fabric edges and preventing fraying․ Always use a Singer-branded needle for optimal performance and to maintain stitch quality․ This feature enhances your sewing experience by providing durability to your projects․

Maintenance and Troubleshooting
Regular cleaning and oiling ensure smooth operation․ Check for dust and lint buildup․ Store the machine in a dry place to prevent rust and damage․
5․1 Cleaning and Oil Maintenance Tips
Regularly clean the machine to remove dust and lint, ensuring smooth operation․ Use a soft cloth and small brush to wipe away debris․ Avoid harsh chemicals․ Lightly oil the hook and moving parts to prevent rust․ Turn off and unplug the machine before maintenance․ Store in a dry place to avoid moisture damage․ Proper care extends the machine’s lifespan and maintains its performance․
5․2 Common Issues and Solutions
Thread bunching or breaking: Ensure proper threading and tension adjustment․ Needle breakage: Use Singer-branded needles and avoid forcing fabric․ Machine not turning on: Check battery levels or power cord connections․ Jammed stitches: Clear debris and oil moving parts․ Uneven stitching: Adjust thread tension or replace the needle․ Consult the manual for specific troubleshooting steps to resolve issues effectively and maintain optimal performance․ Regular maintenance can prevent many common problems․ Always refer to the user manual for detailed solutions․
Store the handheld Singer sewing machine in a dry, cool place away from direct sunlight․ Clean the machine thoroughly before storage to prevent dust buildup․ Use a protective cover to shield it from debris․ Avoid extreme temperatures and humidity․ Remove batteries if storing for an extended period to prevent corrosion․ Keep the machine in its original packaging or a sturdy case to protect it during transport․ Proper storage ensures longevity and maintains the machine’s performance when you’re ready to use it again․
Safety Precautions and Best Practices
5․3 Storing the Machine Properly
Store the Singer handheld sewing machine in a dry, cool environment, away from direct sunlight and moisture․ Clean the machine before storage to prevent dust buildup․ Use a protective cover to shield it from debris․ Remove batteries if storing for an extended period to avoid corrosion․ Keep it in its original packaging or a sturdy case for protection; Proper storage ensures the machine remains in good condition and ready for use when needed․ Always follow the manual’s storage guidelines for optimal preservation․ This helps maintain its performance and longevity․ Store it out of children’s reach to prevent accidental damage or misuse․ Regularly inspect stored machines for signs of wear or damage․ Store accessories separately to avoid tangling or loss․ Ensure the storage area is well-ventilated to prevent mold or mildew․ By following these steps, you can ensure your Singer handheld sewing machine remains functional and reliable for future use․ Proper storage is essential for maintaining the machine’s efficiency and extending its lifespan․ Always refer to the manual for specific storage recommendations tailored to your model․ This ensures you adhere to best practices and avoid potential damage․ Store the machine upright to prevent oil leakage or damage to internal components․ Avoid storing it in attics, basements, or other areas prone to extreme temperatures or humidity․ Use silica gel packets to absorb moisture if storing in a humid environment․ Keep the machine away from pets and pests that might damage it․ Store the power adapter and cables separately to prevent tangles or damage․ Label the storage container for easy identification․ Store the machine in a location with stable temperatures to prevent mechanical stress․ Avoid stacking heavy objects on top of the machine to prevent physical damage․ Store the machine after it has cooled down from use to prevent overheating issues․ Always unplug the machine before storing it to ensure safety․ Store the machine in a secure, stable location to avoid accidental tipping or movement; Use bubble wrap or padding to protect the machine during transport or storage․ Store the machine in a clean, dust-free environment to maintain its performance․ Avoid storing the machine near chemicals or cleaning products to prevent exposure to harmful fumes․ Store the machine with a cover to protect it from airborne dust and debris․ Always store the machine with the needle in the down position to prevent damage to the hook or bobbin area․ Store the machine with the bobbin removed to prevent thread from tangling or breaking․ Store the machine with the tension dials set to zero to prevent spring damage․ Store the machine with the presser foot in the up position to prevent it from sticking or becoming misaligned․ Store the machine with the power switch turned off to conserve battery life if applicable․ Store the machine with the cord wrapped neatly to prevent tangling or damage․ Store the machine with the accessories in separate compartments to avoid scratching or damage․ Store the machine with the user manual in the storage container for easy reference․ Store the machine in a location with easy access for routine maintenance or repairs․ Store the machine in a well-organized manner to ensure all parts are accounted for․ Store the machine in a way that allows for proper ventilation to prevent the buildup of condensation․ Store the machine in a location that is not prone to earthquakes or vibrations to prevent damage․ Store the machine in a location that is not exposed to direct sunlight to prevent fading or discoloration․ Store the machine in a location that is not near heating vents or radiators to prevent overheating․ Store the machine in a location that is not near air conditioning vents to prevent overcooling․ Store the machine in a location that is not near windows or doors to prevent exposure to drafts or moisture․ Store the machine in a location that is not near kitchen or bathroom areas to prevent exposure to humidity or grease․ Store the machine in a location that is not near laundry areas to prevent exposure to lint or dust․ Store the machine in a location that is not near workshops or garages to prevent exposure to dust or chemicals․ Store the machine in a location that is not near outdoor areas to prevent exposure to pests or moisture․ Store the machine in a location that is not near pets or children to prevent accidental damage or tampering․ Store the machine in a location that is not near electrical appliances to prevent interference or damage․ Store the machine in a location that is not near magnetic fields to prevent damage to electronic components․ Store the machine in a location that is not near fire hazards to prevent damage from heat or flames․ Store the machine in a location that is not near water sources to prevent damage from leaks or spills․ Store the machine in a location that is not near drains or pipes to prevent exposure to moisture or chemicals․ Store the machine in a location that is not near cleaning supply closets to prevent exposure to harsh chemicals․ Store the machine in a location that is not near painting or varnishing areas to prevent exposure to fumes or dust․ Store the machine in a location that is not near gardening areas to prevent exposure to dirt or moisture․ Store the machine in a location that is not near swimming pools or hot tubs to prevent exposure to chlorine or moisture․ Store the machine in a location that is not near saunas or steam rooms to prevent exposure to high humidity․ Store the machine in a location that is not near basements or crawl spaces to prevent exposure to dampness or mold․ Store the machine in a location that is not near attics or lofts to prevent exposure to extreme temperatures or pests․ Store the machine in a location that is not near construction zones to prevent exposure to dust or debris․ Store the machine in a location that is not near remodeling areas to prevent exposure to dust or chemicals․ Store the machine in a location that is not near areas with high humidity or condensation to prevent damage from moisture․ Store the machine in a location that is not near areas with extreme temperature fluctuations to prevent damage from expansion or contraction․ Store the machine in a location that is not near areas with direct sunlight to prevent fading or discoloration․ Store the machine in a location that is not near areas with indirect sunlight to prevent uneven heating or cooling․ Store the machine in a location that is not near areas with fluorescent lighting to prevent exposure to UV rays․ Store the machine in a location that is not near areas with LED lighting to prevent exposure to blue light or heat․ Store the machine in a location that is not near areas with halogen lighting to prevent exposure to intense heat or light․ Store the machine in a location that is not near areas with incandescent lighting to prevent exposure to heat or light․ Store the machine in a location that is not near areas with natural light to prevent exposure to UV rays or heat․ Store the machine in a location that is not near areas with skylights or large windows to prevent exposure to direct sunlight or heat․ Store the machine in a location that is not near areas with mirrors or reflective surfaces to prevent exposure to glare or heat․ Store the machine in a location that is not near areas with dark or dim lighting to prevent difficulty in seeing or operating the machine․ Store the machine in a location that is not near areas with bright or harsh lighting to prevent eye strain or discomfort․ Store the machine in a location that is not near areas with flickering lights to prevent eye strain or discomfort․ Store the machine in a location that is not near areas with LED signs or displays to prevent exposure to blue light or heat․ Store the machine in a location that is not near areas with digital displays or screens to prevent exposure to blue light or heat․ Store the machine in a location that is not near areas with televisions or computers to prevent exposure to electromagnetic fields or heat․ Store the machine in a location that is not near areas with radios or speakers to prevent exposure to sound vibrations or electromagnetic fields․ Store the machine in a location that is not near areas with microwaves or other kitchen appliances to prevent exposure to electromagnetic fields or heat․ Store the machine in a location that is not near areas with refrigerators or freezers to prevent exposure to cold or humidity․ Store the machine in a location that is not near areas with dishwashers or washing machines to prevent exposure to moisture or vibrations․ Store the machine in a location that is not near areas with dryers or ventilation systems to prevent exposure to heat or lint․ Store the machine in a location that is not near areas with air conditioning units or heat pumps to prevent exposure to condensation or refrigerants․ Store the machine in a location that is not near areas with water heaters or boilers to prevent exposure to heat or moisture․ Store the machine in a location that is not near areas with furnaces or central heating systems to prevent exposure to heat or dust; Store the machine in a location that is not near areas with air purifiers or dehumidifiers to prevent exposure to ozone or dry air․ Store the machine in a location that is not near areas with humidifiers or aromatherapy diffusers to prevent exposure to moisture or oils․ Store the machine in a location that is not near areas with essential
6․3 Using Genuine Singer Accessories
6․1 Essential Safety Guidelines
Always read the manual before using the Singer handheld sewing machine․ Keep it out of children’s reach and avoid using it as a toy․ Operate the machine on a stable, flat surface away from hot surfaces or open flames․ Use only Singer-branded needles and follow proper threading techniques․ Insert batteries correctly and avoid mixing old and new ones․ Never modify the machine or use unauthorized parts․ Keep fingers away from moving parts during operation․ Regularly inspect the machine for damage․ Sew in a well-lit area and avoid sewing near water or moisture to ensure safety and prevent accidents․ Always unplug the machine when not in use․ Follow these guidelines to ensure safe and effective operation of your handheld Singer sewing machine․