Magic Chef Food Dehydrator Manual: A Comprehensive Guide
Welcome! This manual provides essential instructions for your Magic Chef food dehydrator (model 7100)․ Keep this guide and the original packaging for future reference and troubleshooting․
It details operation, food preparation, safety precautions, and cleaning procedures, ensuring optimal performance and longevity of your appliance․
Explore diverse drying options, from fruits and vegetables to meats, unlocking a world of preserved flavors and healthy snacks․
Congratulations on acquiring a Magic Chef Food Dehydrator! This appliance opens a world of possibilities for preserving your favorite foods, allowing you to enjoy seasonal produce and create healthy snacks year-round․ Dehydration is a time-tested method of food preservation, removing moisture to inhibit spoilage and concentrate flavors․
This manual serves as your comprehensive guide to safely and effectively utilizing your dehydrator․ It covers everything from initial setup and operating instructions to detailed guidance on preparing various food types for optimal drying․ Understanding the principles of dehydration and following these instructions will ensure consistently high-quality results․
The Magic Chef dehydrator is designed for ease of use and efficient performance․ It features adjustable temperature settings and ample drying trays, accommodating a variety of foods simultaneously; Properly dehydrated foods retain their nutritional value, making them a convenient and wholesome addition to your diet․ Please read through this manual thoroughly before your first use to maximize your dehydrating experience․
Contents of Package
Upon opening the box, please verify that all components are present and undamaged․ Your Magic Chef Food Dehydrator package should include the following items:
- Dehydrator Base: The main housing unit containing the heating element and fan․
- Drying Trays: Multiple stackable trays for arranging food during the dehydration process․
- Instruction Manual: This document, providing detailed operating instructions and helpful tips․
Carefully inspect each item for any signs of shipping damage․ If any parts are missing or appear defective, please contact customer support immediately․ Retain the original packaging materials for potential returns or warranty claims․
It is recommended to familiarize yourself with each component before first use․ The drying trays are designed to fit securely onto the base, allowing for even air circulation․ Proper assembly is crucial for efficient dehydration․ Do not attempt to operate the dehydrator if any parts are missing or damaged․ A complete package ensures a smooth and successful dehydrating experience․
Important Safeguards
Read all instructions carefully before operating the Magic Chef Food Dehydrator․ To ensure safe and efficient use, adhere to the following precautions:
- Electrical Safety: Never immerse the base in water or any other liquid․ Avoid using with a damaged cord or plug․
- Supervision: Close supervision is necessary when the appliance is used near children․
- Hot Surfaces: The dehydrator surfaces become hot during operation․ Use oven mitts when handling trays․
- Ventilation: Ensure adequate ventilation around the unit during operation․
- Indoor Use Only: This appliance is designed for indoor household use only․
Do not operate the dehydrator if it has been dropped or damaged in any way․ Always unplug the unit when not in use and before cleaning․ Never leave the dehydrator unattended while in operation․ Modifying the appliance may void the warranty and create a safety hazard․ Following these safeguards will help prevent accidents and ensure years of reliable performance․
Using the Food Dehydrator For The First Time
Before your initial use of the Magic Chef Food Dehydrator, a thorough preparation is recommended to ensure optimal performance and longevity․ Begin by carefully removing all packaging materials and inspecting the unit for any shipping damage․
Wash all removable parts – the trays and any included inserts – in warm, soapy water․ Rinse thoroughly and allow them to air dry completely․ Wipe down the base unit with a damp cloth; never immerse the base in water․
It’s beneficial to run the dehydrator empty for approximately 30 minutes to eliminate any residual manufacturing odors․ This initial run will also help familiarize you with the unit’s operation․ Ensure the dehydrator is placed on a stable, level surface away from flammable materials․ Now your dehydrator is ready for its first batch of delicious, homemade dehydrated foods!
Operating Instructions
The Magic Chef Food Dehydrator is designed for simple and intuitive operation․ First, assemble the dehydrator by stacking the trays onto the base unit․ Ensure each tray is securely seated․ Arrange your prepared food evenly across the trays, avoiding overcrowding to allow for proper air circulation․
Plug the dehydrator into a grounded electrical outlet․ The unit does not feature adjustable temperature settings; it operates at a consistent, optimal temperature for food preservation․ The dehydrator will begin to operate immediately upon being plugged in․
Monitor the drying process periodically, but avoid opening the door frequently as this can prolong drying times․ The duration of drying will vary depending on the food type and thickness – refer to the ‘Drying Time Guidelines’ section for specific recommendations․ Once drying is complete, unplug the unit and allow it to cool before disassembly․
Drying and Selecting Foods to Dry
Food Selection is Key: The Magic Chef dehydrator excels at preserving a wide variety of foods, but quality starts with careful selection․ Choose fresh, ripe, and unblemished produce for the best results․ Overripe or bruised items may not dehydrate effectively and could harbor bacteria․
Best Candidates: Fruits like apples, bananas, and berries are excellent choices․ Vegetables such as carrots, beans, and tomatoes also dehydrate well․ Lean meats, like those used for jerky, are suitable, but require specific preparation (see ‘Drying Meat and Fish’)․
Consider Texture: Foods with higher water content will take longer to dry․ Slice foods uniformly to ensure even dehydration․ Avoid drying oily foods, as they can become rancid․ Prioritize seasonal produce for optimal flavor and nutritional value․ Remember, proper food handling is crucial throughout the entire process․
Preparing Foods to Dry
Essential First Steps: Thorough preparation is vital for successful dehydration with your Magic Chef unit․ Begin by washing all fruits and vegetables meticulously under cool, running water to remove dirt and residue․ Peeling is often recommended, though some skins can be left on for added nutrients (consider texture)․

Slicing and Shaping: Uniformity is paramount․ Slice foods into consistent thicknesses – typically ¼ to ½ inch – to ensure even drying․ Use a sharp knife or mandoline for precision․ For smaller items like berries, consider halving or quartering them․
Pre-treatment Considerations: Some fruits benefit from pretreatment (see ‘Pretreatment of Fruits’)․ Blanching vegetables briefly helps preserve color and nutrients․ Proper preparation minimizes drying time and maximizes the quality of your dehydrated goods․ Always handle food safely to prevent contamination․
Drying Time Guidelines
Estimating Drying Durations: Drying times with your Magic Chef dehydrator vary significantly based on food type, thickness, humidity, and dehydrator load․ These are estimates – always perform a dryness test (see section) to confirm completion․
Fruit Drying Times: Apples typically take 6-12 hours; bananas, 8-16 hours; berries, 12-24 hours․ Vegetable Drying Times: Carrots require 8-14 hours; tomatoes, 8-16 hours; onions, 6-10 hours․ Meat Drying Times: Jerky can take 4-8 hours, but requires careful monitoring for safety․
Important Notes: Rotate trays midway through the drying process for even results․ Higher humidity will extend drying times․ Start checking for dryness several hours before the estimated time․ Consistent monitoring is key to achieving optimal texture and preventing spoilage․
Dryness Test: Determining Completion
Assessing Dryness: Don’t rely solely on estimated drying times! The most reliable method is a physical dryness test․ Remove a few pieces of food from the dehydrator and allow them to cool slightly – warm food feels softer than it is․
Fruit Test: For fruits, press gently․ There should be no soft spots or moisture released․ When bent, fruit leather should peel away cleanly from the tray without sticking․ Vegetable Test: Vegetables should be brittle or leathery, depending on the type․ Snap a piece – it should break cleanly․
Meat Test: Jerky should bend without breaking, and exhibit no moistness․ If any moisture is present, continue drying for another hour and retest․ Proper dryness is crucial for safe storage and preventing mold growth․
Storage of Dehydrated Foods
Proper Storage is Key: Successfully dehydrated foods require airtight storage to maintain quality and prevent reabsorption of moisture․ Ideal containers include glass jars with tight-fitting lids, heavy-duty freezer bags, or vacuum-sealed containers․
Cool, Dark, and Dry: Store dehydrated foods in a cool, dark, and dry location, away from direct sunlight, heat, and humidity․ A pantry or cupboard works well․ Avoid storing near sources of moisture, like the dishwasher or sink․
Container Preparation: Ensure containers are thoroughly clean and dry before storing your dehydrated goods․ For extended storage, consider adding oxygen absorbers to containers, especially for fatty foods like meats, to further prevent spoilage․
Shelf Life of Dehydrated Goods
Determining Longevity: The shelf life of your dehydrated foods depends heavily on storage conditions and the type of food․ Properly stored, dehydrated fruits generally last for 6-12 months, maintaining good quality and flavor․
Vegetable Storage: Dehydrated vegetables typically have a shelf life of 4-12 months, though some, like mushrooms, may degrade in quality faster․ Meat jerky, when properly dehydrated and stored, can last for 1-2 months at room temperature, or longer if refrigerated․
Quality Indicators: Regularly inspect stored foods for signs of spoilage, such as mold, off-odors, or insect infestation․ While dehydrated foods won’t necessarily “go bad” in the traditional sense, quality diminishes over time․ Vacuum sealing significantly extends shelf life for all food types․
How to Clean the Dehydrator
Regular Maintenance: To ensure optimal performance and hygiene, clean your Magic Chef dehydrator after each use․ Begin by unplugging the unit and allowing all components to cool completely․ Remove the trays and wash them in warm, soapy water․ They are also dishwasher safe for convenient cleaning․
Base Cleaning: Wipe down the dehydrator base with a damp cloth․ Avoid immersing the base in water, as this could damage the electrical components․ For stubborn food residue, use a mild abrasive cleaner, but test it in an inconspicuous area first․
Thorough Cleaning: Periodically, disassemble the dehydrator as much as possible and clean all parts thoroughly․ Ensure everything is completely dry before reassembling and storing․ Proper cleaning prevents the buildup of bacteria and ensures the longevity of your appliance․
Rehydrating Dehydrated Foods
Restoring Moisture: Rehydrating dehydrated foods is simple and effectively restores their texture and flavor․ The process depends on the food type and intended use․ For fruits, soaking in warm water for 15-30 minutes is generally sufficient․ Vegetables may require longer soaking times, up to an hour or more, depending on their density․
Cooking Applications: Rehydrated fruits and vegetables are excellent additions to soups, stews, and sauces․ They can also be enjoyed as snacks after rehydration․ Meat jerky can be briefly simmered in water or broth to soften it before incorporating it into recipes․
Considerations: Remember that rehydrated foods will not return to their original texture completely․ They will be softer but may retain a slightly chewier consistency․ Adjust soaking times based on your preference and the specific food being rehydrated․
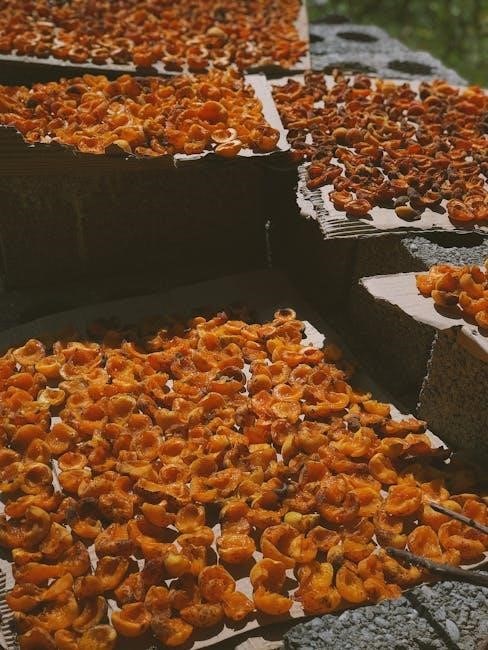
Drying Fruits: A Detailed Guide
Fruit Dehydration Basics: Drying fruits with your Magic Chef dehydrator preserves their natural sweetness and creates delicious, healthy snacks․ Proper preparation is key to achieving optimal results․ Begin by selecting ripe, but not overripe, fruits for the best flavor and texture․
Preparation is Paramount: Wash fruits thoroughly and remove any blemishes or damaged areas; Slicing fruits into uniform pieces, approximately ¼ inch thick, ensures even drying․ Consider the fruit type when determining slice size – smaller pieces dry faster․
Optional Pretreatment: While not always necessary, pretreating fruits with lemon juice or ascorbic acid (Vitamin C) can help prevent browning and preserve color․ This is particularly useful for lighter-colored fruits like apples and peaches․ Refer to the pretreatment section for detailed instructions․
Fruit Preparation Techniques
Washing and Inspecting: Begin by thoroughly washing all fruits under cool, running water․ Gently scrub to remove any dirt or residue․ Carefully inspect each fruit, discarding any pieces that are bruised, moldy, or show signs of spoilage․ Quality in, quality out – this step is crucial!
Slicing and Dicing: Uniformity is key for even drying․ Slice fruits to approximately ¼ inch thickness․ For larger fruits like apples or pineapples, consider coring before slicing․ Berries can be halved or left whole, depending on size․ Remove pits and seeds before dehydration․
Peeling Considerations: Peeling is optional and depends on the fruit․ Peaches, plums, and apricots benefit from peeling to reduce drying time and improve texture․ Apples and pears can be dried with the peel on for added fiber and nutrients․
Pretreatment of Fruits (Optional)

Preventing Discoloration: Certain fruits, like apples, peaches, and pears, tend to brown when exposed to air․ Pretreatment helps maintain their appealing color․ Options include dipping slices in lemon juice (1 tablespoon per quart of water), ascorbic acid (Vitamin C) solution, or a commercial fruit preservative․
Sulfuring (Not Recommended for Home Use): Historically, sulfuring was used to preserve color and prevent spoilage․ However, it’s not generally recommended for home dehydrators due to safety concerns and the availability of alternative methods․
Blanching (Limited Application): Blanching, typically used for vegetables, isn’t common for fruits․ However, some recipes suggest a brief blanch for firmer fruits like plums to crack the skin and speed up drying․
Considerations: Pretreatment can slightly alter the flavor of the fruit․ Always follow recipe guidelines and test a small batch first to ensure desired results․ Remember, pretreatment is optional; fruits will still dehydrate without it․
Fruits That Dry Best in a Dehydrator
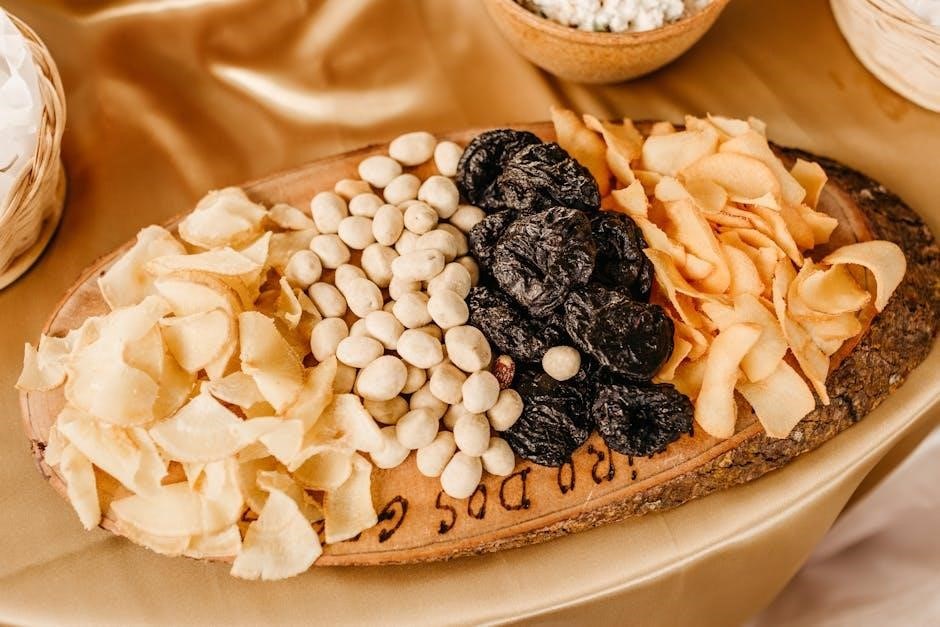
Excellent Choices: Apples, apricots, bananas, mangoes, peaches, pears, plums, and pineapple are exceptionally well-suited for dehydration․ Their natural sugars concentrate during the process, creating intensely flavorful and chewy treats․
Berries – A Bit More Challenging: While blueberries, cranberries, and strawberries can be dried, they require lower temperatures and careful monitoring to prevent them from becoming overly tough․ They often benefit from pretreatment to maintain color․
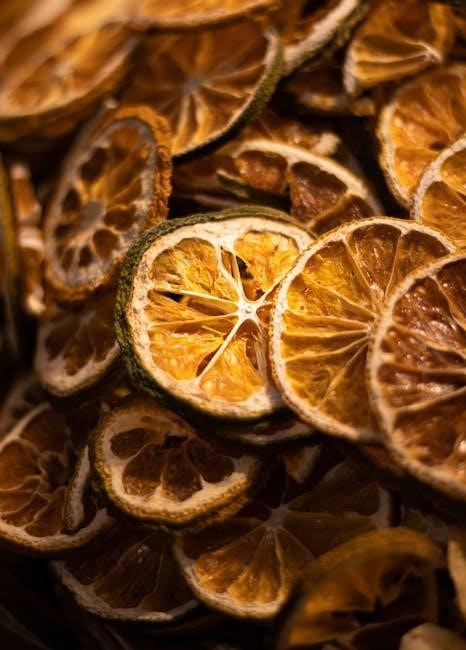
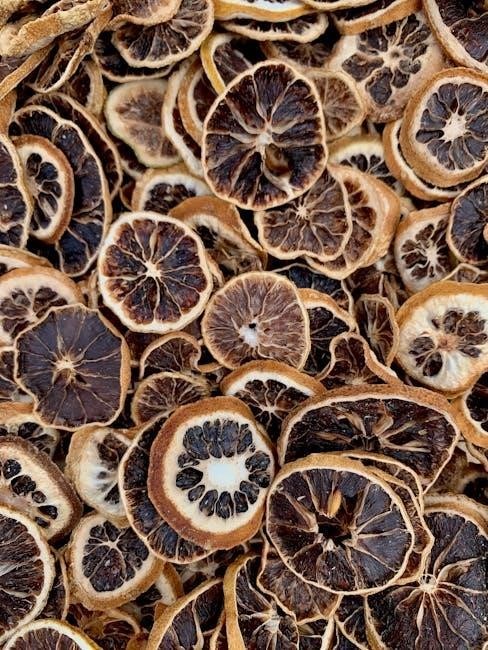
Citrus Fruits: Orange and lemon slices can be dehydrated, but they take considerably longer than other fruits․ They are best used for potpourri or flavoring teas rather than snacking․
Consider Texture: Fruits with higher water content, like watermelon, aren’t ideal for dehydration as they yield a less satisfying texture․ Selecting fruits with firm flesh generally produces the best results․ Experimentation is key to discovering your favorites!
Making Fruit Leather
Puree Perfection: Fruit leather begins with a smooth puree․ Combine your favorite fruits – applesauce, berries, peaches, or mangoes work wonderfully – and blend until completely smooth․ A little lemon juice can enhance flavor and prevent browning․
Sweeten to Taste: Add honey or maple syrup if desired, but remember the dehydration process concentrates sweetness․ Start with a small amount and adjust accordingly․
Preparation is Key: Line your dehydrator trays with plastic wrap or parchment paper (specifically designed for dehydrators)․ Pour the fruit puree onto the prepared trays, spreading it evenly to about 1/8 to 1/4 inch thickness․
Drying Time: Dehydrate at 135°F (57°C) for 6-8 hours, or until the leather is no longer sticky to the touch․ The drying time will vary depending on the fruit and humidity․ Once cooled, peel off the plastic wrap and roll up the leather!
Drying Vegetables: Best Practices
Selection is Paramount: Choose fresh, high-quality vegetables for optimal results․ Slightly immature vegetables generally rehydrate better․ Discard any bruised or damaged portions․
Preparation Techniques: Wash vegetables thoroughly and trim away any stems, cores, or skins as needed․ Slice vegetables uniformly – about 1/4 inch thick – to ensure even drying․ Consistency is key!
Blanching is Beneficial: Blanching most vegetables before dehydration helps preserve color, flavor, and nutrients․ Briefly submerge vegetables in boiling water, then immediately transfer to an ice bath to stop the cooking process․
Arrangement Matters: Arrange vegetable slices in a single layer on the dehydrator trays, ensuring good air circulation․ Avoid overcrowding․ Dehydrate at 125°F (52°C) for 6-12 hours, or until brittle․
Vegetable Preparation for Dehydration

Initial Wash & Trim: Begin by thoroughly washing all vegetables under cool, running water to remove any dirt or residue․ Trim away any inedible parts like stems, cores, and tough skins․ Proper preparation is crucial for quality․
Slicing for Consistency: Uniform slicing is essential for even drying․ Aim for slices approximately ¼ inch thick․ This ensures all pieces dehydrate at a similar rate, preventing some from becoming overly dry while others remain moist․

Consider the Vegetable: Root vegetables like carrots and potatoes benefit from thinner slices․ Leafy greens can be dehydrated whole or coarsely chopped․ Dense vegetables may require scoring to aid moisture escape․
Pre-treatment Options: Some vegetables, like potatoes, benefit from a brief dip in lemon juice to prevent discoloration․ Blanching, as described later, is also a vital pre-treatment step for many varieties․
Pretreatment of Vegetables (Optional)
Blanching: A Key Step: Blanching is highly recommended for most vegetables before dehydration․ This process involves briefly immersing vegetables in boiling water, followed by an immediate ice water bath․ It stops enzyme action that can cause discoloration, flavor loss, and texture changes․
Lemon Juice for Brightness: Light-colored vegetables like cauliflower and potatoes can discolor during drying․ A quick dip in a solution of lemon juice and water (1 tablespoon lemon juice per quart of water) helps maintain their appealing color․
Ascorbic Acid Alternative: Ascorbic acid (Vitamin C) can also be used as an anti-darkening agent, offering a similar benefit to lemon juice․ Follow package directions for proper concentration․
Steam Blanching Option: For delicate vegetables, steam blanching is a gentler alternative to boiling․ Ensure vegetables are heated through but retain some crispness․ Proper pretreatment maximizes quality and shelf life․
Drying Vegetables: Process and Tips
Arrangement is Crucial: Arrange vegetable slices in a single layer on the dehydrator trays, ensuring air can circulate freely around each piece․ Overlapping will significantly increase drying time and potentially lead to spoilage․
Rotation for Evenness: Rotate the trays periodically during the drying process․ This promotes even dehydration, as heat distribution may vary within the dehydrator․
Temperature Guidelines: A temperature of 125°F (52°C) is generally recommended for drying vegetables․ Adjust slightly based on the specific vegetable and desired texture․
Monitor and Adjust: Regularly check the vegetables for dryness․ Drying times will vary depending on humidity, vegetable thickness, and dehydrator performance․ Patience is key to achieving optimal results․
Proper Ventilation: Ensure adequate ventilation in the room where the dehydrator is operating to allow moisture to escape efficiently․
Vegetables That Dry Best
Excellent Choices: Certain vegetables lend themselves exceptionally well to dehydration, retaining flavor and texture beautifully․ These include carrots, green beans, bell peppers, onions, and tomatoes․
Carrots & Beans: Carrot slices and green beans dry remarkably well, becoming delightfully chewy and concentrated in flavor․ Blanching is recommended for these to preserve color and nutrients․
Peppers & Onions: Bell peppers, sliced into rings or strips, and onions, thinly sliced, are also excellent candidates for dehydration, perfect for adding to soups or stews․
Tomatoes – A Versatile Option: Tomatoes can be dried whole, halved, or sliced, resulting in a concentrated flavor ideal for sun-dried tomato recipes or snacking․
Considerations: While most vegetables can be dried, those with higher water content, like lettuce, don’t typically yield satisfactory results․ Experiment to discover your favorites!
Drying Meat and Fish
Safety First: Dehydrating meat and fish requires meticulous attention to safety to prevent spoilage and ensure a palatable, healthy product․ Proper preparation and consistent temperatures are crucial․
Lean Cuts Preferred: Use very lean cuts of meat, trimming away all visible fat․ Fat can become rancid during storage, impacting flavor and shelf life․ Fish should also be skinless and boneless․
Marinating for Flavor: Marinating meat before dehydration enhances flavor and can act as a tenderizer․ Ensure marinades are thoroughly incorporated before the drying process begins․
Temperature Control: Maintain a consistent dehydrator temperature, typically between 130°F and 160°F (54°C and 71°C), to effectively eliminate moisture and inhibit bacterial growth․
Complete Drying is Key: Meat and fish must be dried completely to prevent spoilage․ A flexible, leathery texture indicates proper dehydration․ Store properly in airtight containers․
Clean and Prepare Meat/Fish with Care
Hygiene is Paramount: Before beginning, thoroughly wash your hands with soap and water․ Sanitize all surfaces and utensils that will come into contact with the raw meat or fish to prevent cross-contamination․
Trimming and Slicing: Remove all visible fat from the meat or fish․ Fat spoils quickly during dehydration․ Slice the meat or fish into uniform strips, approximately ¼ inch thick, for even drying․ Consistent thickness is vital․
Pre-Treatment Options: Consider pre-treating meat with a curing salt to enhance flavor, color, and preservation․ Follow package instructions carefully when using curing salts․
Marinades for Enhanced Flavor: Marinades can tenderize and add flavor․ Ensure the meat is fully submerged in the marinade for the recommended time․ Pat dry before arranging on dehydrator trays․
Preventing Contamination: Use separate cutting boards and utensils for raw meat/fish and other foods․ Thoroughly clean and disinfect everything after use․ Proper handling is essential for food safety․
Meat Jerky: A Specific Application
Jerky Creation: Making meat jerky is a popular use for your Magic Chef dehydrator․ Begin with lean cuts of beef, venison, or poultry, sliced thinly against the grain for optimal tenderness․
Marinade Mastery: A flavorful marinade is key․ Combine soy sauce, Worcestershire sauce, brown sugar, spices (pepper, garlic powder, onion powder), and optional liquid smoke․ Marinate for at least four hours, or preferably overnight, in the refrigerator․
Arrangement and Drying: Arrange marinated strips in a single layer on the dehydrator trays, ensuring they don’t overlap․ Set the temperature to 160°F (71°C) for approximately 4-8 hours, depending on thickness and desired dryness․
Checking for Doneness: Jerky should bend without breaking․ If it’s too pliable, continue drying․ If it snaps easily, it’s over-dried․ Adjust drying time accordingly․
Cooling and Storage: Allow jerky to cool completely before storing in an airtight container․ Properly made jerky can last for several weeks when stored correctly․